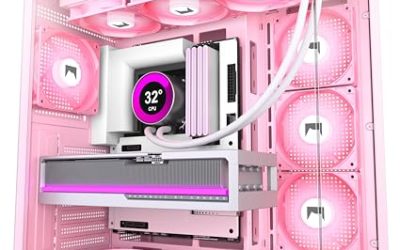
Positive pressure sounds simple: bring in more air than you exhaust and keep dust out. In practice, most builders get it backwards. They buy three flashy exhaust fans, add one weak intake behind a restrictive front panel, and wonder why every crack in the case becomes a dust magnet. If you are learning how to choose case fans for positive pressure setup, the goal is not maximum airflow on paper, it is balanced, filtered intake that overpowers exhaust by a small, sustainable margin.
The most common mistakes are easy to avoid once you know them. First, mismatching fan sizes and speeds so intake never actually exceeds exhaust. A 120mm fan at 800 RPM will not overcome two 140mm exhaust fans at 1400 RPM, no matter what the box claims. Second, obsessing over CFM and ignoring static pressure. A high-airflow fan chokes behind a solid front panel, mesh filter, or hard drive cage. Third, mixing connectors and control types with no plan, leaving fans at 100 percent all day or unable to ramp with temperature. Fourth, buying on looks alone and ending up with loud, short-lived sleeve bearings mounted horizontally on top exhaust. Get those four right and the rest is fine-tuning.
As an Amazon Associate we earn from qualifying purchases at no extra cost to you.


Our Top Picks
 be quiet! Pure Wings 3 120mm PWM High-Speed120mm PWM high-speed4.7 x 4.7 x 1 inches0.4 PoundsCheck on Amazon


Top 3 picks at a glance
Decide These 3 Things First
Before you compare models, lock in these decisions. They determine everything else you buy.
1. Your pressure target and dust strategy. True positive pressure means total intake airflow is about 10 to 20 percent higher than total exhaust. You achieve this with more intake fans, larger intake fans, or higher RPM on intake, all pulling through dust filters. If your case has unfiltered vents along the top or side, you will need an even larger intake bias to keep those gaps from becoming intakes.
2. Your case layout and mount limits. Check your manual for exactly which sizes fit where. A typical mid-tower supports 120mm or 140mm in front (2x or 3x), 120mm or 140mm on top (2x), and 120mm in the rear. Compact cases may only fit 92mm or 80mm in key spots. Measure clearance too: a standard fan is 25mm thick, but some low-profile mounts need 15mm slim fans. You also need to know if front mounts sit behind a filter and solid panel, which demands higher static pressure.
3. Your noise and control tolerance. Do you want a silent build that stays under 30 dBA at your desk, or maximum cooling where 35 to 40 dBA is acceptable under load? That choice dictates whether you shop PWM 4-pin fans with a wide RPM range and rubber mounting, or simple 2-pin DC fans that run at a fixed voltage and speed.
Size and Fit: Will It Actually Mount?
Fan size is not about bigger is better, it is about what your case can seal and filter as intake.
120mm is the standard. It fits almost every case, moves 45 to 75 CFM at 1200 to 1800 RPM, and costs the least to replace. A good 120mm intake fan weighs 140 to 180 grams and draws 1.2 to 3.0 watts. Use it when your front panel supports two or three 120s and you want even coverage through filters.
140mm moves more air per revolution and per decibel. Expect 60 to 95 CFM at 1000 to 1500 RPM with noticeably lower noise than a faster 120mm. It weighs 170 to 210 grams and often draws 1.5 to 3.6 watts. If your front supports 140s, two 140mm filtered intakes can beat three 120mm intakes for positive pressure while staying quieter.
80mm and 92mm fans have a specific job: small form factor cases, rear exhaust, or slim side mounts. An 80mm fan is 80 x 80 x 25mm, moves 20 to 35 CFM at 1500 to 2200 RPM, and weighs 50 to 75 grams. A 92mm fan is 92 x 92 x 25mm, moves 30 to 45 CFM at similar RPM, and weighs 70 to 95 grams. Slim variants like 92 x 92 x 15mm save 10mm of clearance for tight CPU coolers or sandwich-layout cases but trade about 15 to 25 percent airflow at the same RPM. Do not use 80mm fans as primary filtered intakes for a mid-tower if you can fit 120s; you will need very high RPM to match the volume and noise will rise sharply.
Check three numbers before you buy: frame dimensions, screw spacing, and thickness. A 120mm fan uses 105mm screw spacing, a 140mm uses 124.5mm, and an 80mm uses 71.5mm. If your filter or radiator adds 5 to 7mm, a 25mm thick fan plus filter may not clear a front-mounted GPU or drive cage.
Airflow, Pressure, and Noise: What Moves Air Without the Roar
For positive pressure, prioritize filtered intake performance over raw exhaust power.
Airflow (CFM) tells you volume in open air. Static pressure (mmH2O) tells you how well a fan pushes through restriction. Front intakes behind a nylon filter and perforated panel need at least 1.2 to 2.0 mmH2O to maintain useful flow. Exhaust fans with an open grill can get by with 0.8 to 1.2 mmH2O. If your case has a solid glass or plastic front with narrow side vents, treat intake exactly like a radiator: you need pressure-optimized blades with tighter tip clearance, not wide, high-CFM blades designed for open test benches.
Noise scales with RPM. A well-balanced 120mm fan at 1000 to 1200 RPM typically measures 19 to 24 dBA at one meter. The same fan at 1800 to 2000 RPM lands at 30 to 36 dBA. For positive pressure in a living space, aim to keep intakes at 900 to 1300 RPM under load and let exhaust run 100 to 200 RPM slower. That 10 to 20 percent RPM delta is usually enough to maintain positive pressure without turbulence.
Blade design matters. Seven to nine blades with a steeper pitch generally produce higher pressure. Eleven-blade designs can be quieter but may stall sooner behind a dense filter. Do not chase ultra-high-speed fans for intakes; a high-speed 120mm that tops out at 2000 to 2200 RPM is excellent as intake only if you cap it in BIOS to 60 to 70 percent for daily use and save the top end for summer heat waves.
Construction and Bearing Type: What Lasts
A fan that will run 8 to 12 hours daily for years needs the right bearing and frame.
Fluid dynamic bearings (FDB) and rifle bearings are the sweet spot for most builders in 2026. They run quietly, handle horizontal mounting on top panels, and typically last 40,000 to 60,000 hours. That is roughly 4.5 to 7 years of continuous operation. Dual ball bearings last even longer, 50,000 to 75,000 hours, and tolerate heat well, but cost more and can have a faint whine at low RPM. Basic sleeve bearings are cheapest, 25,000 to 30,000 hours, and wear faster when mounted horizontally or in warm cases. Avoid sleeve for top exhaust if you keep the PC for more than two years.
Frame and material affect vibration and seal. Look for glass-fiber reinforced PBT frames, balanced impellers, and anti-vibration pads or rubber corners. Weight is a clue: a cheap 120mm at 90 to 110 grams often uses thinner plastic and looser tolerances that hum at resonance. A solid 120mm at 150 grams or more usually dampens better. Daisy-chain or modular cables and sleeved wiring reduce clutter that can block the slight positive pressure you are trying to create.
Dust defense is part of construction too. Sealed bearing hubs and closed corners keep dust from wicking into the motor. If your environment is dusty or has pets, prioritize intakes with good filters first, then fans with higher pressure to overcome those filters, rather than fans that claim dust resistance but have weak pressure.
Power, Control, and Wiring: PWM vs DC
How a fan is controlled determines whether you can actually hold positive pressure across idle and load.
PWM (4-pin) is the best choice for positive pressure. It accepts a true RPM signal from the motherboard, allowing a range like 400 to 1800 RPM with accurate steps. That lets you set an intake-biased fan curve: intakes at 40 percent at idle, exhaust at 30 percent, both ramping together but keeping the intake lead. Power draw per fan is modest, 1.2 to 3.6 watts at 12V, so three intakes place only 4 to 10 watts total on a header group. Most motherboard headers support 12 watts (1 amp), so use a powered hub if you run four or more fans from one header.
DC (3-pin) fans are voltage-controlled. They work, but control is coarser and minimum speed is higher, often 600 to 800 RPM versus 300 to 500 RPM for PWM. You may not be able to run them slow enough at idle to stay silent while still keeping the pressure bias.
Fixed-speed 2-pin fans running directly from 12V run at one speed. They are common in small 80mm packs and useful for simple exhaust or chipset cooling, but they are a poor choice for primary filtered intakes in a positive pressure plan because you cannot create an intake bias that adapts to temperature. If you use them, put them on exhaust and control pressure with larger or more numerous PWM intakes.
Cable length matters in larger cases. Standard pigtails are 300 to 500mm. If your hub is at the bottom rear, top exhaust may need 600mm or an extension. Plan splitters early so you do not block intakes with a bundle of wires.
Price Tiers: What You Get for Your Money
Case fans are one area where paying a little more for intakes pays back daily in noise and dust control.
Performance is fine for rear exhaust or secondary top exhaust. For front filtered intake duty, budget fans can work if you buy three and run them at moderate RPM, but expect more motor whine over time and less consistent low-RPM control.
You get FDB or enhanced rifle bearings, 120mm and 140mm options with pressure of 1.4 to 2.2 mmH2O, PWM control down to 400 to 600 RPM, rubber mounting, and better balance. Many reliable high-speed 120mm PWM fans that top out near 2000 RPM live here and are ideal when tuned down to 1100 to 1300 RPM for daily use.
The benefit is not much higher max CFM, it is lower noise at the same pressure. For a silence-focused positive pressure build with a restrictive front, two premium 140mm intakes often outperform three budget 120mm intakes while saving 4 to 6 dBA.
Warranty, Support, and Delivery
Fans are small, but failures are annoying when they require tearing down filters and cable management.
Warranty is a proxy for bearing life. Budget fans often carry 1 to 2 years. Mid-range fans typically offer 3 years. Premium models often include 5 to 6 years. If a manufacturer rates life at 50,000 hours but warranties only 12 months, expect looser support. Check whether warranty requires returning the entire multi-pack or just the defective unit, and whether the seller or manufacturer handles RMA.
Delivery and packaging affect condition. Look for retail boxes with blade guards; bulk trays can arrive with bent corners that create ticking. Fan weight with packaging is usually 180 to 300 grams per unit, so a 3-pack ships at 0.6 to 0.9 kg. If you need the build done on a weekend, confirm fulfillment speed; many sellers ship small fan packs in padded envelopes that are more prone to corner damage than boxed shipments. Keep the spare screws, rubber mounts, and splitter cables; replacements are rarely sold separately.
Assembly is simple but easy to get wrong for pressure. Mount intakes with the open side and support struts facing inside the case and the flow arrow pointing in. Seal unused fan mounts with magnetic covers or tape on the inside so your intake bias is not wasted pulling air through an empty top slot. After install, clean filters every 2 to 4 weeks; a clogged front filter can turn positive pressure negative without any settings change.
Spec Checklist
| Spec | Budget | Mid | Premium |
|---|---|---|---|
| Typical Size | 80mm / 120mm x 25mm | 120mm / 140mm x 25mm, PWM | 120mm / 140mm x 25mm, PWM low-noise |
| Airflow (CFM) | 30 to 55 | 50 to 85 | 60 to 95 with lower noise |
| Static Pressure (mmH2O) | 0.8 to 1.5 | 1.4 to 2.2 | 1.8 to 2.8 |
| Speed Range (RPM) | 800 to 1800 fixed or narrow DC | 400 to 1800 PWM | 300 to 1500 PWM, quiet curve |
| Noise at 1000 RPM (dBA) | 22 to 26 | 19 to 23 | 17 to 21 |
| Bearing / Life | Sleeve / Rifle, 25k-35k hours | FDB / Rifle, 40k-60k hours | Dual Ball / Premium FDB, 60k-75k hours |
| Power per Fan | 1.0 to 2.5W, 2-pin or 3-pin | 1.2 to 3.0W, 4-pin PWM | 1.5 to 3.6W, 4-pin PWM hub-ready |
| Weight | 90 to 140 g | 150 to 190 g | 170 to 210 g |
| Price per Fan | Check on Amazon | Check on Amazon | Check on Amazon |
| Warranty | 1 to 2 years | 3 years | 5 to 6 years |
| Best Use for Positive Pressure | Rear or spare exhaust | Front filtered intake | Filtered intake behind restrictive panel |
Red Flags
Watch for these warning signs before you buy.
- No static pressure rating listed, only max CFM. That usually means it stalls behind filters and is not suited for filtered intake.
- Fixed 12V 2-wire pigtail on a primary intake fan. You cannot tune an intake lead without PWM or voltage control.
- Sleeve bearing advertised for horizontal top mount with no life derating. It will get noisy within a year in that orientation.
- Extremely high RPM without a low minimum speed. A 2500 to 3000 RPM fan that cannot drop below 900 RPM is hard to keep quiet while holding a gentle pressure bias.
- Thin, lightweight frame under 100 grams for a 120mm fan and no anti-vibration mounting. Expect resonance and case hum transfer.
- Multi-pack with a single shared connector and no pass-through or hub. You lose individual control and may overload one header.
- Front panel with no filter included and large unfiltered gaps elsewhere. No fan can create positive pressure if dust can bypass the filter.
FAQ
How many intake vs exhaust fans do I need for positive pressure?
Start with one more intake than exhaust, or the same count but larger or faster intakes. A reliable baseline for a mid-tower is two or three 120mm or 140mm filtered intakes in front and one 120mm rear exhaust. If you add top exhaust, keep it to one fan or run the two top fans 150 to 200 RPM slower than the front intakes. Measure with a tissue at an unfiltered vent: if it is gently pushed outward, you have positive pressure.
Should intakes be high airflow or high static pressure?
High static pressure for any intake behind a filter, mesh, or narrow side vent. High airflow works only in open, unrestricted mounts. For most modern cases with filters and perforated fronts, a pressure-optimized fan rated 1.4 to 2.2 mmH2O will deliver more real intake volume than a higher-CFM fan rated 0.9 mmH2O, and it will hold the bias when dust loads the filter.
Can I use 80mm or 92mm slim fans for positive pressure?
Yes in compact cases where 120mm will not fit. Use two 80mm or 92mm intakes to replace one 120mm and keep RPM matched. A 92mm x 15mm slim at 1800 to 2700 RPM can work as filtered intake in tight spaces, but expect 4 to 7 dBA more noise than a 120mm at lower RPM for the same volume. If clearance allows 25mm thickness, prefer it; the thicker fan is more efficient.
What fan curve keeps positive pressure without extra noise?
Set all fans to PWM and create two curves linked to CPU or motherboard temperature. Keep intakes 10 to 20 percent ahead of exhaust at every point. For example, 30 percent intake and 20 percent exhaust at 40 degrees, 50 percent intake and 40 percent exhaust at 65 degrees, 75 percent intake and 60 percent exhaust at 80 degrees. Cap maximum exhaust below intakes and clean filters monthly so the curve does not need to compensate for clogging with higher RPM.