Ceiling fans are the unsung heroes of home comfort, circulating air to keep rooms feeling up to four degrees cooler while drawing only 30 to 75 watts of power. However, because they constantly pull air upward, they act like giant magnets for airborne dust, pet dander, and aerosolized cooking oils. Over time, this mixture cures into a stubborn, sticky film on the fan blades.
When it comes time to clean this grime, many homeowners inadvertently damage their fan’s most critical component: the motor bearing. Applying too much downward pressure while scrubbing can bend the blade irons (the metal brackets holding the blades), throwing the fan permanently out of balance. Worse yet, spraying liquid cleaners directly onto the motor housing allows moisture to seep into the sealed bearing. Once water or harsh degreasers penetrate the bearing casing, they strip away the factory-applied lubricant, leading to friction, annoying squeaks, motor drag, and eventual electrical burnout.
As an Amazon Associate we earn from qualifying purchases at no extra cost to you.
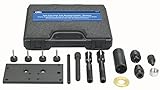

In automotive and motorcycle repair, mechanics rely on heavy-duty, highly specialized gear like the OTC 4847A Twin Cam Inner Cam Bearing Remover and Installer Kit (priced around $350) or the Sporthfish 34902-84 for Harley Big Twin Transmission Mainshaft Inner Bearing Race Tool Installer & Puller SetHowever, residential ceiling fans are not engineered for easy bearing extraction or DIY rebuilding. If you strip the lubricant from a ceiling fan’s sealed ball bearing, you cannot easily pull it out with a specialty kit; you will almost certainly have to replace the entire motor assembly. Protecting the bearing in place is your only viable strategy.
Our Top Picks


What You Need
Before climbing your ladder, gather the correct tools. Avoid abrasive scouring pads, harsh chemical solvents, or dripping wet sponges that can introduce moisture to the motor housing.
| Item | Why You Need It | Optional? |
|---|---|---|
| Step Ladder | Provides a stable platform so you do not have to stretch or pull downward on the fan blades. Use a 4-foot to 6-foot ladder with a minimum 225-lb duty rating. | No |
| Microfiber Cloths | The split fibers lift and trap sticky grease and dust rather than smearing them around. | No |
| Mild Dish Soap or Castile Soap | Cuts through polymerized kitchen grease and household dust without degrading wood veneers, lacquer, or plastic. | No |
| Warm Water | Acts as the carrier for your soap. Should be warm, not boiling. | No |
| An Old Pillowcase | Encloses the blade to trap falling dust clumps, preventing them from scattering onto your furniture. | Yes (highly recommended) |
| 70% Isopropyl Rubbing Alcohol | Helps dissolve stubborn kitchen grease and evaporates rapidly, minimizing moisture exposure near the motor. | Yes (for kitchen fans) |
| Drop Cloth or Old Sheet | Protects flooring, carpets, or bedding directly beneath the fan from falling sticky debris. | No |
Step-by-Step
Follow this precise method to restore your sticky fan blades to a pristine state while keeping the internal bearings completely dry and stress-free.
Step 1: Power Down and Isolate the Fan
Time Estimate: 2 minutes
Safety is paramount. Turn off the fan using the wall switch or remote control. For an extra layer of safety—especially if you are working on a fan with integrated lighting or a remote receiver—flip the corresponding breaker in your home’s electrical panel. Never attempt to clean a fan while the blades are in motion, as this can bend the blade irons and instantly damage the motor spindle.
Step 2: Set Up Your Workspace
Time Estimate: 5 minutes
Position your step ladder slightly to the side of the fan, rather than directly underneath it. This positioning allows you to reach the blades comfortably from the side without stretching, which helps prevent you from accidentally leaning on or pulling down on the blades. Lay your drop cloth or old bedsheet directly on the floor beneath the fixture to catch any stray debris.
Step 3: The Pillowcase Dry-Dusting Method
Time Estimate: 8 minutes
Before applying any liquid, remove the loose, dry layer of dust. Slide an old pillowcase over one of the fan blades. Press your hands lightly against the top and bottom of the blade through the fabric, and pull the pillowcase back toward the tip. The dust will peel off and remain trapped inside the pillowcase instead of raining down on your face. Repeat this process for all 4 or 5 blades.
Step 4: Mix and Apply the Safe Cleaning Solution
Time Estimate: 15 minutes
Mix 2 to 3 drops of mild dish soap into a small bowl of warm water. Crucial rule: Never use a spray bottle directly on the fan. Spraying liquids creates an airborne mist that can easily float into the motor housing vents, settling directly onto the bearing seals. Instead, dip a microfiber cloth into the soapy water and wring it out thoroughly until it is barely damp to the touch. It should not drip when squeezed.
Step 5: Clean the Blades with One-Handed Support
Time Estimate: 15 minutes
To prevent putting any structural stress on the motor bearing or bending the delicate blade brackets, always use a two-handed cleaning technique:
- Use your non-dominant hand to firmly support the metal blade iron close to the motor housing. This counteracts any pressure you apply while wiping.
- Use your dominant hand to gently wipe the damp microfiber cloth along the length of the blade, moving from the motor outward to the tip.
- If you encounter stubborn, sticky grease spots (common on kitchen fans), pour a dime-sized amount of 70% isopropyl alcohol onto a clean, dry microfiber cloth and gently buff the sticky spot. The alcohol dissolves the grease and evaporates almost instantly, keeping the bearing safe from moisture.
Step 6: Dry and Inspect
Time Estimate: 5 minutes
Use a completely dry microfiber cloth to wipe down any remaining moisture on the blades. Inspect the blade brackets to ensure they are clean and that no liquid has run down toward the center motor housing. Once everything is bone-dry, remove your drop cloths, restore the power at the breaker, and turn the fan on low to verify smooth, quiet operation.
Mistakes to Avoid
Even well-meaning homeowners can ruin a ceiling fan by making simple mistakes during the cleaning process. Keep these warnings in mind:
- Never spray cleaners directly onto the fixture: Liquid droplets find their way through the motor vents, causing corrosion and stripping the factory grease out of the sealed bearings.
- Avoid pulling down on the blades: Ceiling fan blade irons are made of cast zinc or aluminum. They bend easily under downward pressure. Even a 1/16-inch bend can cause a permanent wobble, putting uneven, destructive wear on the motor bearing during operation.
- Skip the harsh solvents: Avoid using acetone, mineral spirits, or heavy-duty chemical degreasers. These solvents can melt plastic blades, dissolve the clear coat on real wood veneers, and quickly degrade the rubber seals protecting the ball bearings.
- Do not use abrasive pads: Steel wool, scouring pads, or melamine foam sponges (such as magic erasers) can strip the decorative paint or lacquer finish off the blades, leaving them vulnerable to humidity and warping.
How Often to Clean
To prevent sticky buildup from hardening into a difficult-to-remove layer, establish a regular maintenance schedule. Looking ahead into 2026, home wellness trends continue to emphasize indoor air quality, making regular ceiling fan maintenance a key priority for reducing circulating household allergens.
- Every 2 to 4 weeks: Perform a quick dry dusting using a long-handled microfiber duster or the pillowcase method to prevent loose dust from bonding with household moisture.
- Every 6 months: Conduct a thorough damp-cleaning using the soap-and-water method outlined above.
- For kitchen or dining room fans: Perform a damp-cleaning every 3 months. Aerosolized cooking grease quickly binds with dust, creating a stubborn, glue-like film that is much harder to remove if left for half a year.
When to Call a Pro or Replace
In most cases, a thorough, careful cleaning will restore your fan’s quiet performance. However, there are times when DIY maintenance is no longer sufficient:
- High ceilings: If your fan is mounted on a cathedral or vaulted ceiling higher than 12 feet, do not risk balancing on a tall ladder. Hire a professional cleaning service or a licensed electrician who has the proper scaffolding and safety equipment.
FAQ
Can I use WD-40 to clean or lubricate my fan bearings?
No. WD-40 is a water-displacing solvent, not a long-term lubricant. If you spray it into your fan’s motor housing, it will actually dissolve and flush out the heavy factory grease inside the sealed ball bearings, causing them to fail completely within a few weeks of use. If your bearings require lubrication, use a few drops of specialized, non-detergent SAE 15 or SAE 20 electric motor oil, but only if your fan model has a designated oil port.
Is it safer to unscrew and remove the blades to clean them?
Yes. If you have a highly sensitive or expensive fan, or if the grease buildup is exceptionally thick, unscrewing the blade irons from the motor assembly is the safest approach. Removing the blades completely eliminates the risk of bending the brackets or putting downward physical stress on the motor spindle and bearings while you scrub. Simply lay the removed blades flat on a table to clean and dry them before screwing them back on.
Why do kitchen ceiling fans get stickier than bedroom fans?
When you cook, tiny droplets of oil and fat become airborne steam. This vaporized grease drifts throughout your living spaces and eventually settles on the ceiling fan blades. When household dust lands on this sticky grease layer, they bond together, forming a tough, polymerized coating that cannot be removed by simple dry dusting.
How can I tell if my fan’s bearings are already damaged?
Turn the fan off and let it come to a complete stop. Reach up and gently spin the blades by hand. A healthy fan with undamaged bearings should spin silently, smoothly, and continue coasting for a long time before stopping. If you feel resistance, hear a grinding or dry rubbing noise, or if the fan stops spinning almost immediately after you release it, the bearings are dry, dirty, or structurally damaged.